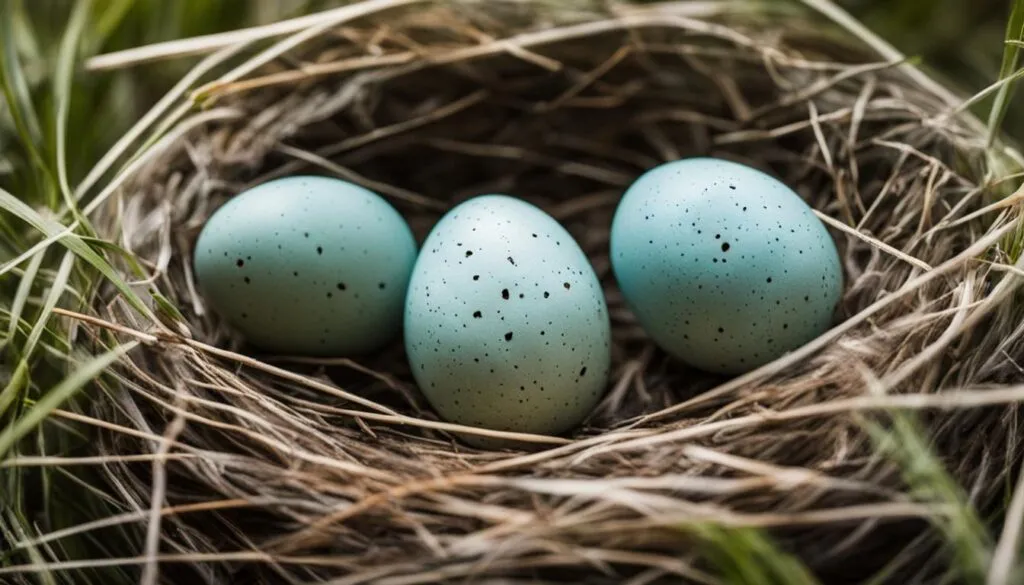
Finch breeding becomes far less mysterious once you learn how to interpret what is happening inside the nest. One of the most important skills I developed over time was recognizing the difference between fertile and infertile eggs. It saved me from unnecessary waiting, helped me understand my pairs better, and allowed me to make adjustments that improved future clutches. Finch eggs may look identical on the outside, but they tell different stories once you know how to examine them responsibly and without stressing the parents.
I try to approach egg assessment with patience because finches can abandon their nests if disturbed too often. At the same time, leaving eggs untouched for the entire incubation period sometimes causes confusion about what is going wrong. Finding the balance between gentle observation and respectful distance is the key. By paying close attention to certain visual cues and behavioral patterns, I can usually determine whether the breeding process is progressing well or if something needs to be evaluated.
Natural Visual Clues from the Parents
Before I even touch an egg, I observe the parents. A pair that is incubating actively usually signals that they believe the clutch is worth their effort. If both parents take turns sitting on the eggs, if they guard the nest more fiercely than usual, or if they vocalize when I come near the cage, it often indicates they sense development happening.
On the other hand, a pair that barely visits the nest or only sits for short periods usually hints at infertile eggs. Finches have strong instincts, and they sometimes abandon clutches early when they detect no development. These behavioral cues do not confirm fertility, but they guide me on whether a closer check is needed.
Safe Candling Practices
Candling is one of the most reliable methods I use to distinguish fertile eggs from infertile ones. It involves holding the egg gently in the fingers and shining a small light behind it. The light passes through the shell, revealing the inside. I make sure to candle during the evening or in a darkened room to get the clearest view. It is important to handle the eggs minimally and never during the earliest days of incubation because rough handling or temperature changes can harm developing embryos.
A tiny flashlight with a narrow beam works well, but I avoid high heat lights or powerful bulbs. I try to keep the process quick, returning the egg to the same position in the nest so the parents do not become confused or stressed.
What Fertile Eggs Look Like
Fertile eggs begin to show noticeable changes around day four to day six of incubation. When I candle an egg at this stage, I usually see a network of thin red veins branching from a darker spot near the center. This darker spot is the developing embryo, and the veins are the early circulatory system. As the days progress, the interior becomes more opaque as the embryo grows.
In fertile eggs, the air sac at the wider end tends to be clear and well-defined. This sac slowly increases in size as the chick grows and uses the moisture inside the egg. Fertile eggs often look active, meaning there are clear signs of movement or shifting shadows when the embryo responds to light.
What Infertile Eggs Look Like
Infertile eggs typically remain clear or only slightly cloudy even after several days of incubation. When I candle them, I see no branching veins, no dark embryo spot, and no structural changes. They often look like a uniformly tinted oval with the yolk floating freely inside. If the egg remains unchanged after a week, it is usually infertile.
Sometimes I see a yellowish or light orange glow, which means the egg contains only yolk without development. If the egg has been incubated but shows no signs of life after day ten, I consider it infertile. Leaving infertile eggs in the nest does not harm the pair, but it may delay their ability to try again, so I remove them carefully once I am certain.
Recognizing Dead-in-Shell Eggs
Not all eggs that fail to hatch are infertile. There are cases where embryos begin to develop but stop partway through. I can tell a dead-in-shell egg apart from an infertile one because it often shows a dark, irregular shape inside but lacks pronounced veins or movement. The contents appear dense and immobile.
Sometimes fungus or bacteria infect the egg, creating unusual discoloration or cloudy patches. If I spot these issues early, I remove the egg to prevent contamination of the remaining clutch. It is disappointing to see development stop, but identifying the issue helps me make environmental or dietary improvements for the next clutch.
Factors That Influence Fertility
Whenever I encounter multiple infertile eggs, I look deeper into potential causes rather than assuming the pair is incompatible. Temperature plays a major role because finches require consistent warmth during the breeding period. Sudden cold drafts or varying light cycles can impact mating behavior and egg development.
Nutrition also has a strong influence on fertility. A pair that does not receive sufficient protein, vitamins, and minerals—particularly vitamin E and calcium—may produce eggs that never develop. I make sure to offer egg food, fresh greens, and mineral supplements during the breeding season. Healthy parents are far more likely to produce healthy eggs.
Age of the birds matters as well. Very young finches often lay infertile clutches as they mature, while older birds may experience declining fertility. Identifying these patterns helps me determine whether to give the pair more time or pair them with different partners.
Timing Matters When Checking Eggs
I avoid candling too early because I risk misjudging eggs that simply have not developed enough to show visible signs. If I candle before day four, I rarely see anything helpful, which can create unnecessary concern. My ideal window begins around day seven. By then, the differences between fertile and infertile eggs are much easier to see.
I also avoid candling too often. Disturbing the nest repeatedly can stress the pair or cause them to abandon their clutch. I usually do one check around day seven and another if needed closer to day twelve. After that, I allow the parents to finish the incubation process without interruption.
The Role of Nest Hygiene
Eggs can fail to develop if the nest conditions are not suitable. Dirty nests can harbor bacteria, mites, or excess moisture. I notice that finches are more successful when I provide clean, dry nesting materials before they start laying. Nest hygiene directly influences embryo survival, especially during the earliest stages, so I always make sure the breeding cage is properly cleaned beforehand.
If I see consistent issues with dead-in-shell eggs, I inspect the nest design, ventilation, and the surrounding humidity levels. Proper airflow helps prevent mold and keeps the eggs at the right moisture balance.
Behavioral Signals from the Pair
Finches communicate a surprising amount through their behavior, especially during incubation. A devoted pair that takes turns incubating and feeding each other usually indicates a healthy breeding cycle. Their consistent warmth and dedication help boost egg development.
If the pair begins to lose interest, leave the nest frequently, or appear restless, I usually consider it a sign that the clutch may not be progressing. These cues do not replace candling, but they help me decide how closely I need to monitor the situation.
Environmental Conditions That Affect Development
I pay close attention to the breeding room itself. Temperature swings can disrupt development even when the eggs are fertile. Stable, moderate temperatures give embryos the best chance. The same goes for humidity. If the environment is too dry, eggs can lose moisture too quickly and become impossible for the chick to hatch. If it is too humid, the developing chick may drown in excess fluid.
Lighting can indirectly influence fertility as well. Finches rely on consistent light cycles to maintain hormonal balance. Erratic lighting schedules sometimes throw their breeding rhythm off, leading to infertile clutches.
Removing or Leaving Infertile Eggs
Once I confirm that certain eggs are infertile, I consider whether to remove them. Leaving infertile eggs in the nest can encourage the parents to continue incubating unnecessarily. Removing them gives the pair a chance to reset and prepare for a new attempt. I only remove eggs when I am absolutely certain they are infertile and handle the process gently so the parents do not panic.
If the pair is especially nervous or prone to abandoning clutches, I sometimes leave the infertile eggs until the end of the incubation period. There are times when disturbing the nest does more harm than good. In those cases, patience becomes the better choice.
Watching for Late Development
Some eggs show delayed development, especially with younger pairs or inconsistent incubation early on. That is why I avoid making final judgments too soon. If the egg shows even slight signs of progress but is not as advanced as expected, I let the parents continue. Late bloomers do happen, and I prefer not to discard eggs prematurely.
The only time I make an early decision is when the egg clearly shows no life at all, even well past the typical development window. Once the incubation period exceeds eighteen days with no signs of pipping or movement, I usually consider the clutch finished.
Using Fertility Results to Improve Future Breeding
Each breeding attempt teaches me something. When I identify patterns—whether eggs are consistently infertile, embryos die early, or hatching fails near the end—I adjust my approach. Sometimes it means improving the diet. Other times it means separating a troublesome flock or stabilizing room temperature.
These small changes can turn an unreliable pair into consistent parents. Learning to identify fertile versus infertile eggs is not just about determining what is happening inside the shell. It is also about reading the bigger picture of the breeding environment.
Giving the Pair the Best Chance
The more I work with finches, the more I realize that successful breeding is not based on one single factor. It is a combination of health, stability, environment, and instinct. Accurately identifying fertile and infertile eggs allows me to make informed decisions throughout the breeding cycle. It helps me understand what the pair needs and prevents wasted time and repeated frustration.
This process has become one of the most valuable tools in my finch-keeping experience. Fertile eggs tell a story of growing life, while infertile ones highlight areas for improvement. Both are equally important in guiding the direction of future breeding attempts. If you want another breeding-related topic, I can write it next.